---
title: 'Features overview'
taxonomy:
category:
- docs
---
* [What is AdGuard VPN for iOS](#adguard-vpn)
* [How to use AdGuard VPN for iOS](#use)
* [Lists of exclusions](#exclusion)
* [App settings](#settings)
* [Operating mode](#operating-mode)
* [DNS server](#dns-server)
* [Wi-Fi auto-protection](#wi-fi)
* [Theme](#theme)
* [Advanced settings](#advanced-settings)
* [Quick Actions](#quick-actions)
* [Support](#support)
* [Unlimited version](#unlimited-version)
## What is AdGuard VPN for iOS
A VPN allows you to create a secure connection to another network on the Internet. It connects a user's computer or mobile device to a server and allows one to browse the net using someone else's IP address. So if the VPN server is located in a different country, it will appear that you have connected to the Internet from that country, hence, plenty of resources will become available to you. [Learn more](link) about how a VPN works in detail.
Speaking of AdGuard VPN, it has several functions:
* hides your real whereabouts and helps you stay anonymous
* allows to bypass geo-blocking of some websites by hiding your location and changing your IP address
* encrypts your traffic to protect your data from tracking
The next advantage of AdGuard VPN for iOS is our own VPN protocol. It has two main benefits: comparing to other VPN protocols it is extremely hard to detect and it works stably even with a poor Internet connection. You can read more about AdGuard VPN protocol [in this article](link).
## How to use AdGuard VPN for iOS
To use AdGuard VPN for iOS, first you need to log into your [AdGuard account](https://my.adguard.com/). You can sign in directly with your AdGuard account credentials, or via Google, Apple ID, or Facebook (if your AdGuard account was registered using the same email address).
If you don't have an AdGuard account yet, you will have to create it first.
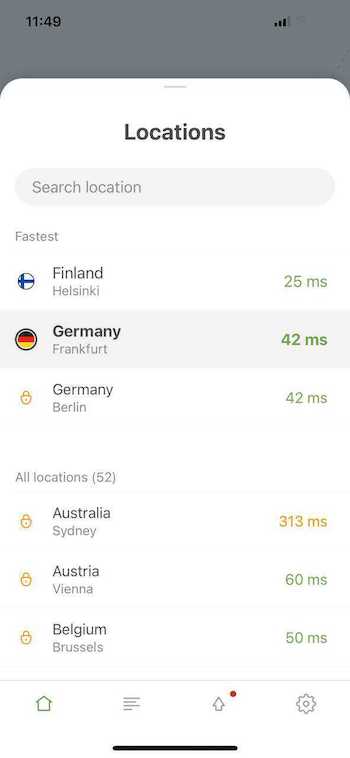
Using AdGuard VPN is quite easy. On the main screen you can see the *Connect/Disconnect* button and the list of available servers. There servers have their own location (a certain country and a city) and ping indicator. TThe ping describes the response time of the server (in milliseconds). For example, choosing the server with the ping of 22 ms means that the signal will reach the server and return back in 22 milliseconds. So the lower this rate, the faster is your connection. In AdGuard VPN you can choose among over 50 locations in dozens of countries.
## Lists of exclusions
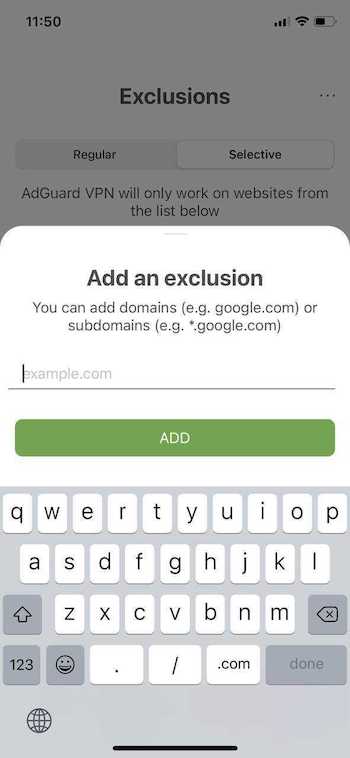
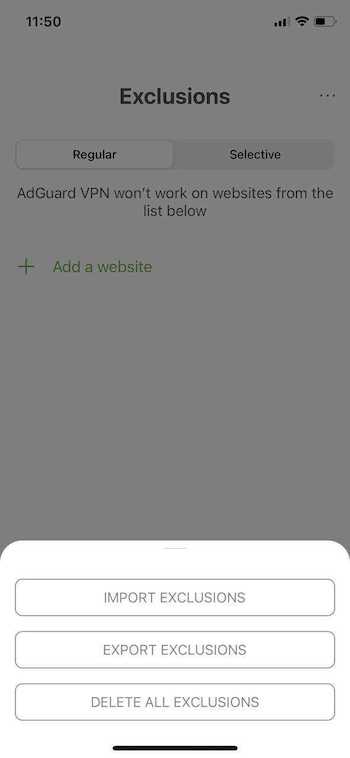
You can find the exclusion feature by tapping the middle button below. There you will see two exclusion lists — for Regular and Selective Modes. In the Regular mode the VPN works on all websites except for the ones from the exclusion list. In the Selective mode, conversely, the VPN operates only on the sites from the list. You can add domains (e.g. `google.com`) or subdomains (e.g. `*.google.com`) of websites in two ways: you can enter them manually in the app or right from the browser by clicking the *Share* button and finding AdGuard VPN in the opened list below.
Another useful feature is the import/export of exclusion lists. You can do it by following the next four steps:
1. Open AdGuard VPN on the device/in the browser from where you want to export your lists of exclusions. Find the appropriate section and click on the *Export* button. The `exclusions.zip` archive will be downloaded.
2. There are two `.txt` files inside the archive, one for each of Regular and Selective lists. Add more exclusions to them, delete the existing ones, rename files (but more on this later), or just leave the archive with files as is.
3. When transferring between different devices, don't forget to send the `.zip` file to the device for import. For example, if you import exclusion lists from your iOS device to your Mac, make sure to send the `.zip` file to your Mac beforehand.
4. Open AdGuard VPN on the device where you want to import the archive with the ready lists of exclusions. Find the appropriate section, click on the *Import* button and select the archive.
 ## App settings
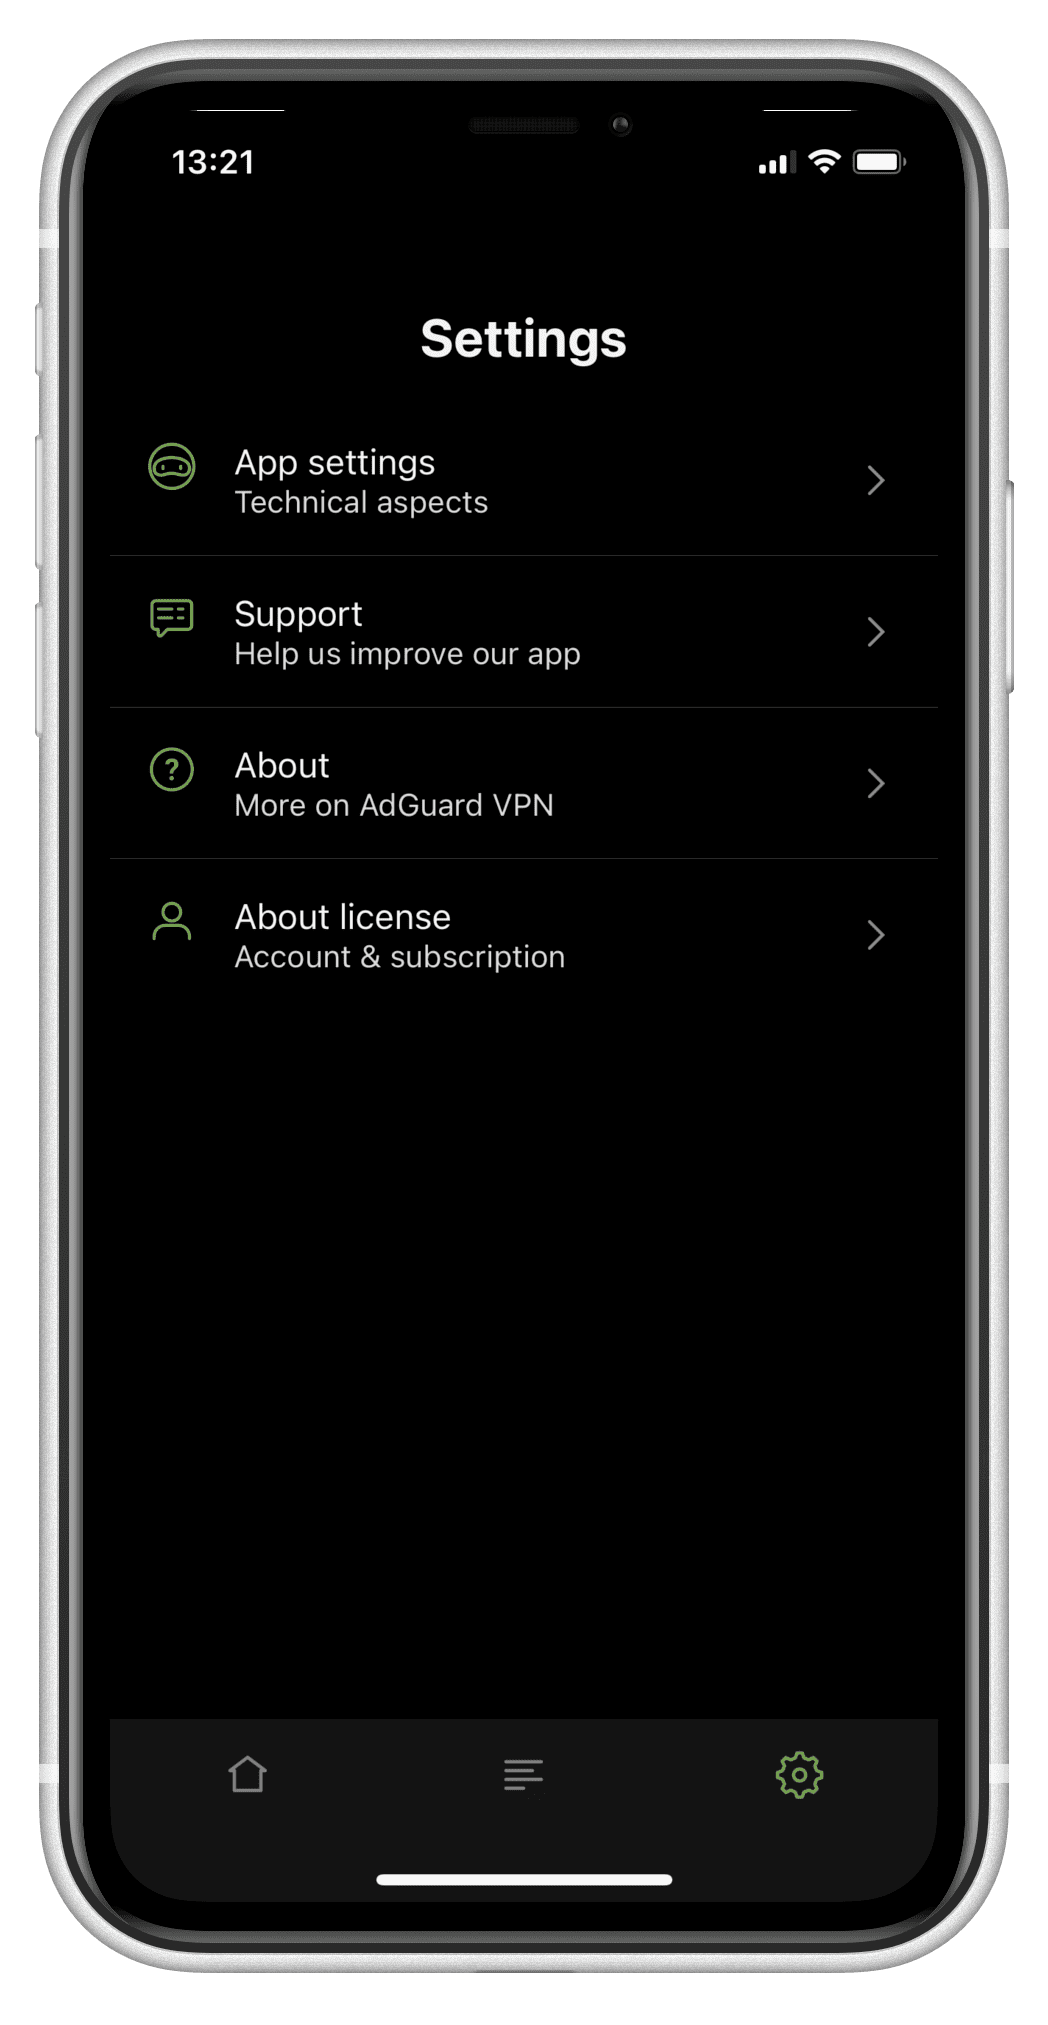
You can find App settings by pressing the *Settings* button in the bottom right of the screen. You can configure AdGuard VPN for iOS as you need by selecting different options.
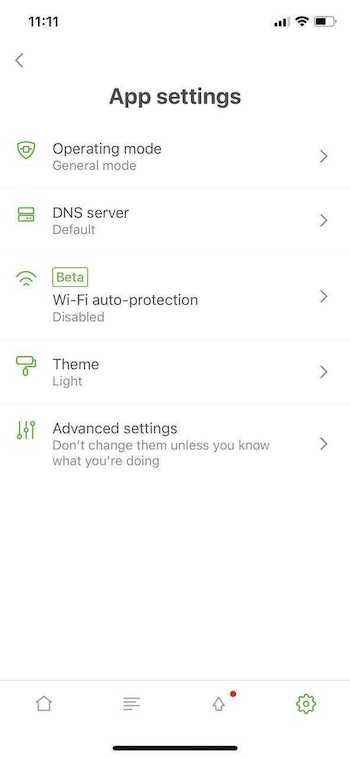
### Operating mode
AdGuard VPN for iOS can operate in two modes: **General** and **Integrated**.
In **General** mode, the [AdGuard VPN protocol](#adguard-vpn) is employed, which provides the best combination of speed and security. In this mode, AdGuard VPN will not be able to work alongside [AdGuard for iOS ad blocker](https://kb.adguard.com/en/ios).
In **Integrated** mode, AdGuard VPN will be able to work at the same time with AdGuard for iOS ad blocker by using the IPSec protocol instead. This protocol is also secure, but a little slower and easier to detect. You don't need to perform any additional actions to set up the integration: just install both apps and switch to this mode.
>Note that in **Integrated** mode you can't use the Exclusions feature or choose a DNS server.
### DNS server
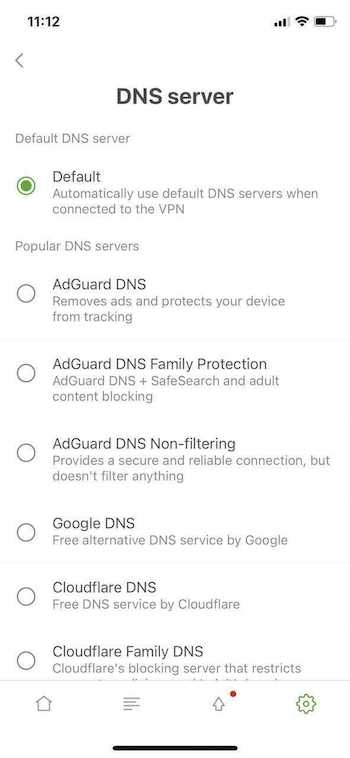
The purpose of Domain name system (DNS) is to translate websites' names into something browsers can understand, i.e. IP addresses. This job is performed by DNS servers. AdGuard VPN for iOS offers a choice between several DNS servers, each with their own special qualities. For example, AdGuard DNS removes ads and protects your device from tracking while AdGuard DNS Family Protection combines the functions of AdGuard DNS with SafeSearch and adult content blocking. DNS servers by different DNS providers may also work faster or slower depending on your location, ISP, and other factors. Choose the one that works best for you. You can find out more about DNS and its characteristics [in this article](https://kb.adguard.com/en/general/dns-filtering#what-is-dns).
## App settings
You can find App settings by pressing the *Settings* button in the bottom right of the screen. You can configure AdGuard VPN for iOS as you need by selecting different options.
### Operating mode
AdGuard VPN for iOS can operate in two modes: **General** and **Integrated**.
In **General** mode, the [AdGuard VPN protocol](#adguard-vpn) is employed, which provides the best combination of speed and security. In this mode, AdGuard VPN will not be able to work alongside [AdGuard for iOS ad blocker](https://kb.adguard.com/en/ios).
In **Integrated** mode, AdGuard VPN will be able to work at the same time with AdGuard for iOS ad blocker by using the IPSec protocol instead. This protocol is also secure, but a little slower and easier to detect. You don't need to perform any additional actions to set up the integration: just install both apps and switch to this mode.
>Note that in **Integrated** mode you can't use the Exclusions feature or choose a DNS server.
### DNS server
The purpose of Domain name system (DNS) is to translate websites' names into something browsers can understand, i.e. IP addresses. This job is performed by DNS servers. AdGuard VPN for iOS offers a choice between several DNS servers, each with their own special qualities. For example, AdGuard DNS removes ads and protects your device from tracking while AdGuard DNS Family Protection combines the functions of AdGuard DNS with SafeSearch and adult content blocking. DNS servers by different DNS providers may also work faster or slower depending on your location, ISP, and other factors. Choose the one that works best for you. You can find out more about DNS and its characteristics [in this article](https://kb.adguard.com/en/general/dns-filtering#what-is-dns).
 ### Wi-Fi auto-protection
VPN will automatically turn on when the device connects to a Wi-Fi network.
### Theme
You can choose system default, dark or light theme of the app (available in iOS 13 and later versions).
### Advanced settings
In the *Advanced settings* you can find two sections — Logging level and Diagnostic info. Concerning the first option it is not recommended to enable the Extended logging level unless requested by our support team. Diagnostic info, locally stored technical information about the device and connections (IP address, ID, ping, etc.), can be sent to us in case of any technical problems.
## Quick Actions (available in iOS 13 and later versions)
To access this feature, touch and hold the app icon, then lift your finger. You'll see a list of Quick Actions: Connect/Disconnect to the currently selected server, Choose location to select a new server location. You can also, of course, access all default actions like removing the app or moving the app icon around.
### Wi-Fi auto-protection
VPN will automatically turn on when the device connects to a Wi-Fi network.
### Theme
You can choose system default, dark or light theme of the app (available in iOS 13 and later versions).
### Advanced settings
In the *Advanced settings* you can find two sections — Logging level and Diagnostic info. Concerning the first option it is not recommended to enable the Extended logging level unless requested by our support team. Diagnostic info, locally stored technical information about the device and connections (IP address, ID, ping, etc.), can be sent to us in case of any technical problems.
## Quick Actions (available in iOS 13 and later versions)
To access this feature, touch and hold the app icon, then lift your finger. You'll see a list of Quick Actions: Connect/Disconnect to the currently selected server, Choose location to select a new server location. You can also, of course, access all default actions like removing the app or moving the app icon around.
 ## Support
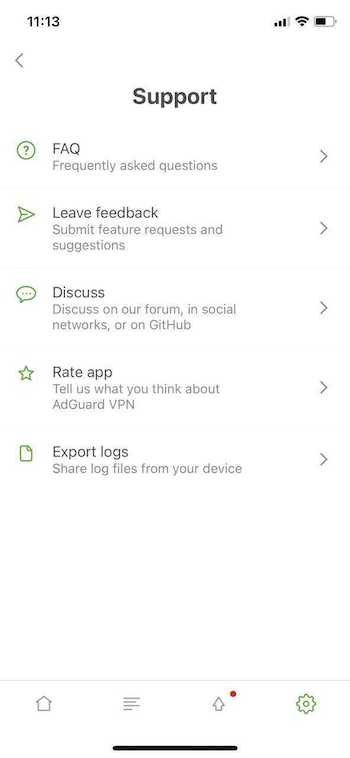
The users' accomplishment is the high priority for us. So there is a variety of helping features in the app (press the *Settings* button at the bottom right and then *Support*): you can see the FAQ section, report a bug, leave feedback, discuss your problems and suggestions on our forum, in social networks, or on GitHub, rate AdGuard VPN for iOS in the App Store and export logs.
## Support
The users' accomplishment is the high priority for us. So there is a variety of helping features in the app (press the *Settings* button at the bottom right and then *Support*): you can see the FAQ section, report a bug, leave feedback, discuss your problems and suggestions on our forum, in social networks, or on GitHub, rate AdGuard VPN for iOS in the App Store and export logs.
 ## Unlimited version
You can purchase a subscription of AdGuard VPN to get the unlimited version of the App. In the *Settings* choose *About license* and press the *Manage* button. You will be sent to the browser page where you can choose a monthly or a yearly payment plan.
A subscription allows to have more benefits comparing to a free account:
* 5 simultaneously connected devices *vs.* 2 devices with enabled AdGuard VPN
* Unlimited traffic *vs.* 3 GB of traffic per month
* No speed cap *vs.* 20 Mbit/sec speed limit
You can read more about the differences between a free and a paid version [in this arcticle](link).
## Unlimited version
You can purchase a subscription of AdGuard VPN to get the unlimited version of the App. In the *Settings* choose *About license* and press the *Manage* button. You will be sent to the browser page where you can choose a monthly or a yearly payment plan.
A subscription allows to have more benefits comparing to a free account:
* 5 simultaneously connected devices *vs.* 2 devices with enabled AdGuard VPN
* Unlimited traffic *vs.* 3 GB of traffic per month
* No speed cap *vs.* 20 Mbit/sec speed limit
You can read more about the differences between a free and a paid version [in this arcticle](link).